Remelt Crawfish Ornament
Start off with Amazing Remelt, Sculpey, cookie cutter, Amazing Clear Cast, and decorative tissue or napkin.
I have an awesome crawfish cookie cutter that I wanted to use to make some Christmas ornaments.
I conditioned and then rolled out some Sculpey clay and pressed the cookie cutter in the clay.
I then punched a hole in the top of the clay crawfish with a straw. Then baked following the Sculpey directions.
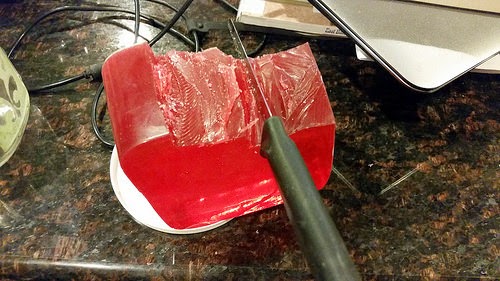
I cut the Amazing Remelt in small pieces and melted in the microwave in 30 second intervals. I have discovered that if you stir the remelt, the heat from the melted pieces will help melt some of the unmelted pieces. Just like when melting chocolate.
A plastic sandwich storage container was the perfect size for my clay ornament.
I double stick taped the ornament to the bottom of the container and started to pour the remelt over the ornament. I left overnight.
After the remelt cured I could easily take out the ornament and the pop the remelt out of the container.
I mixed a batch of Amazing Clear Cast and pour a thin layer in the bottom of the remelt mold. I know you are supposed to spray the mold release in first but I forgot, but amazingly I had no issues. After about 6 hours I poured another thin layer of Amazing Clear Cast. I repeated about 4 times.
After all the layers were made, I easily pulled the cast out of the mold with no damage to the mold
Not only that, there was no pitting from the melting of the mold by the curing. The secret is thin layers. While this is time consuming, Rome wasn't built in a day.
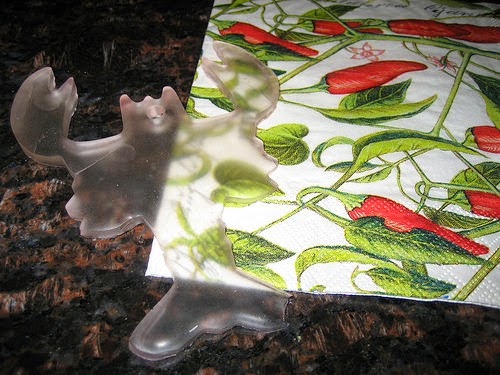
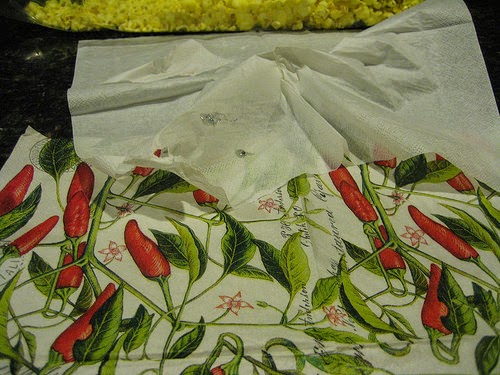
I had some chili pepper napkins that I thought would look great on the crawfish. So I separated the layers of napkin until I had just the printed layer.
I attached the napkin design side down to the back side of the resin crawfish. I want to paper to be attached to the back side and you look through the clear resin to see the design.
I mixed a little Amazing Clear Cast and used a qtip to glue the paper to the back of the crawfish.
After the backside cured, I used a qtip to apply clear resin to the front of the crawfish to bring the frosty look to shiny.
Craft Your Own Way!
Tanya
I have an awesome crawfish cookie cutter that I wanted to use to make some Christmas ornaments.
I conditioned and then rolled out some Sculpey clay and pressed the cookie cutter in the clay.
I then punched a hole in the top of the clay crawfish with a straw. Then baked following the Sculpey directions.
I cut the Amazing Remelt in small pieces and melted in the microwave in 30 second intervals. I have discovered that if you stir the remelt, the heat from the melted pieces will help melt some of the unmelted pieces. Just like when melting chocolate.
A plastic sandwich storage container was the perfect size for my clay ornament.
I double stick taped the ornament to the bottom of the container and started to pour the remelt over the ornament. I left overnight.
After the remelt cured I could easily take out the ornament and the pop the remelt out of the container.
I mixed a batch of Amazing Clear Cast and pour a thin layer in the bottom of the remelt mold. I know you are supposed to spray the mold release in first but I forgot, but amazingly I had no issues. After about 6 hours I poured another thin layer of Amazing Clear Cast. I repeated about 4 times.
After all the layers were made, I easily pulled the cast out of the mold with no damage to the mold
 |
| look how smooth the inside of the mold is! |
 |
| The top of the crawfish looks frosted but in the end it will look great. |
I attached the napkin design side down to the back side of the resin crawfish. I want to paper to be attached to the back side and you look through the clear resin to see the design.
I mixed a little Amazing Clear Cast and used a qtip to glue the paper to the back of the crawfish.
After the backside cured, I used a qtip to apply clear resin to the front of the crawfish to bring the frosty look to shiny.
 |
| you can even layer the napkin for a cool effect |
How awesomely cool is this?
I had one little corner that I didn't get the resin even and didn't realize until I had taken the cast out of the mold. Regardless, the crawfish came out amazing!Craft Your Own Way!
Tanya

.jpg)

.jpg)


Comments